

CMS Integrations
Most of the work you do in Gauge is about your owned content: finding the pages that need work, writing new pieces to win prompts, and keeping everything up to date. Linking your CMS lets you pull your existing pages into Gauge, edit them with the agent, and publish the changes back to your site.Why Link Your CMS
Edit Existing Content
Gauge pulls your published pages out of your CMS so you can work on them directly. You can edit a page yourself or ask the agent to do it for you, for example refreshing it with new data, tightening sections, or rewriting it to target a specific prompt. When the page is ready, choose a destination and the supported publication mode. The review step depends on the destination:
Use Publish and measure content for a complete walkthrough.
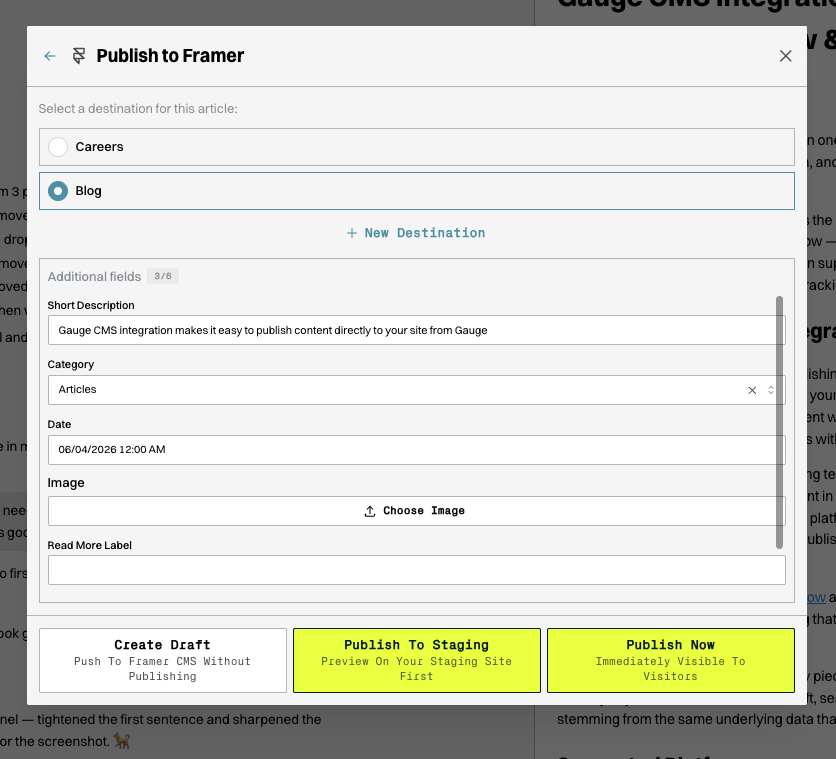
Choosing a destination and how to publish. Webflow works the same way.
Publish New Content
When you finish a new piece in Ask Gauge, choose the publication mode supported by its destination. You can also update and republish a page later, or unpublish a piece to remove it from your site.Manage Content in Library
Library is organized around your sitemap, pulled directly from your connected CMS. Importing your content brings every published post into one view, where you can see Google Search impressions and clicks, AI traffic, citation rate, and bot traffic side by side. This shows which pages are working, which are being cited, and which need attention. From Library you can open any page to start editing it with the agent.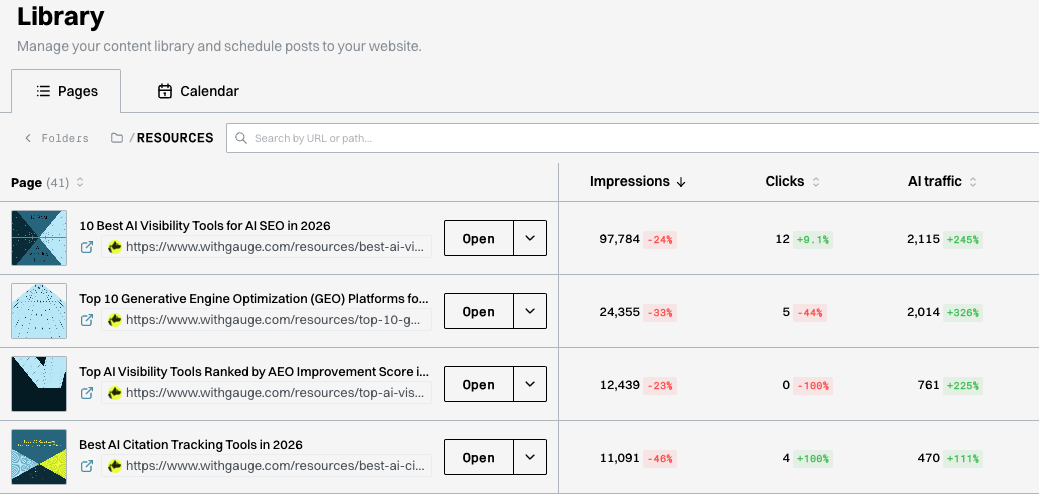
The Pages view in Library, with metrics for each post pulled from your CMS
Linking Your CMS
All of these integrations live under Settings → Integrations. Each one shows a connection status and the steps to get set up. Cards appear when enabled for your organization; contact support if an expected card is missing. During import, a field-mapping step lines up the fields in your CMS collection (like title and body) with Gauge.Webflow
Webflow connects through OAuth, so you authorize Gauge directly in Webflow.- Go to Settings → Integrations and find the Webflow card.
- Click Connect Webflow.
- Sign in to Webflow and approve the requested permissions. Gauge needs read and write access to your CMS, sites, and pages so it can import and publish content.
- When you return to Gauge, the card shows a Connected badge.
- Click Import your Content to choose a site, select the collections you want, map their fields, and bring your posts into Library.
Framer
Framer connects with an API key and your project URL, which you create inside Framer.- Open your Framer project and go to Site Settings → General.
- Scroll to API Keys and create a new key.
- Find your Project URL. This is the URL in your browser when the project is open in Framer (for example,
https://framer.com/projects/abc123). - In Gauge, go to Settings → Integrations, find the Framer card, and click Connect Framer.
- Paste in your API key and project URL, then connect.
- Once connected, click Import your Content to select collections, map fields, and bring your posts into Library.
GitHub
The GitHub integration is for code-based blogs, such as a Next.js site where posts live as Markdown files in a repository. Instead of publishing through a hosted CMS, Gauge commits your posts as Markdown and opens a pull request, so publishing fits your normal code review and deploy flow.- In Gauge, go to Settings → Integrations and find the GitHub card.
- Click Connect and install the Gauge GitHub App on the repository that holds your blog, approving the requested access.
- When you return to Gauge, the card shows a Connected badge along with the connected account.
- Point Gauge at the folder where your Markdown posts live and pick the branch to publish from. Gauge samples an existing post to map its frontmatter fields (like
titleanddate), plus the Markdown body, to Gauge.
Because publishing happens through a pull request, nothing goes live until you merge — this is the built-in review step for code-based blogs.
Sanity
Sanity connects with an API token, and Gauge publishes into your Sanity Content Lake.- In Sanity, create an API token with read and write access to the project you want to connect (sanity.io/manage → your project → API → Tokens).
- In Gauge, go to Settings → Integrations, find the Sanity card, and paste in your API token.
- Click Connect. Gauge looks up the projects and datasets your token can reach and connects straight through when there’s only one — otherwise it asks you to pick the project and dataset.
- Once connected, the card shows your project and dataset. Import your content, map the document fields, and your posts appear in Library.
Sanity’s schema lives in your Studio code rather than in a stable API, so Gauge infers a document type’s fields by sampling existing documents. Connect a project that already has published posts so the field mapping has something to work from.